A line follower is just like a hello world in robotics. Many have been made and nowadays are based on arduino boards, this time I want to go old school and build this simple line follower from parts on my bin. The DS89C430 is a fast 8051 core variant from Maxim, before the era of arduino these are the microcontrollers that only requires UART connection and do not require a external programmer to load the bootloader because it is loaded with bootloader already from the factory and only a terminal program is required to load the hex file generated from the assembler or compiler.
This line follower consist of 3 TCRT5000 reflective IR sensors that goest to a LM339 quad comparator that gives the microcontroller a high or low signal when a black line is detected or not. A L9110S motor driver module was used to drive the two DC motors in differential drive mode. The whole project is powered by a single 3.7V 18650 battery from an old laptop battery pack. The output is fed to a boost converter based on the classic MC34063 to boost the battery voltage to 5V. The complete schematic is show below.
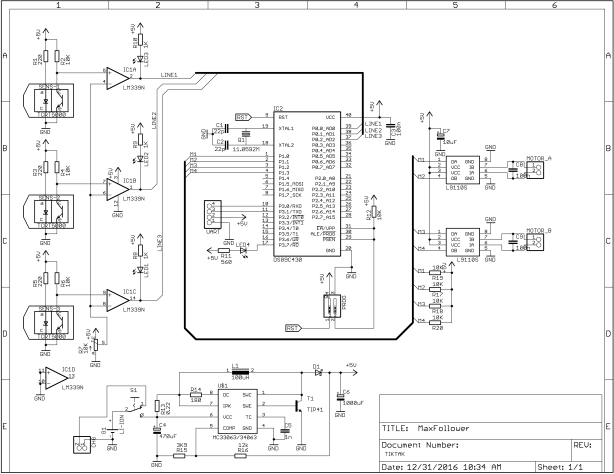
Schematic Diagram
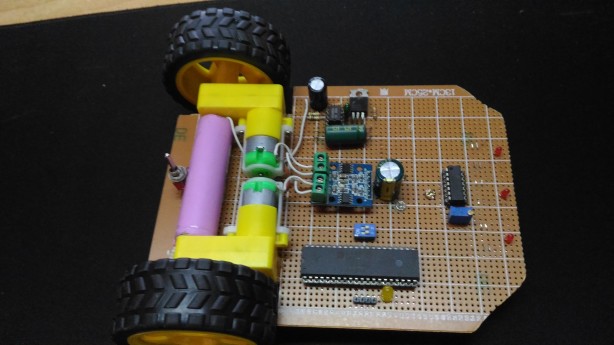
The whole project is built on a strip board with mixed thru hole and surface mount components depending on what I have on my bin.

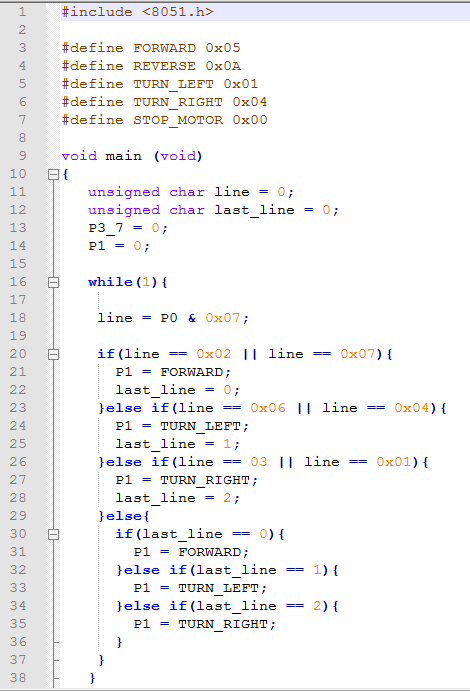
And now the code! Basically a logic based on its position on the track. One motor is stopped to make a turn. The code is compiled with SDCC.
Voila! a nice line follower that can navigate even a complicated track! See the video demo below